Roles and Permissions allow you to manage user access and maintain compliance across your organization by specifying exactly what each team member can view and perform within the solution.
Access control is managed using two primary components: Roles (and permissions) and Access Policies
You can create and assign roles to each user with the permissions they’ll need to complete tasks, such as managing workflows/responses and organization data.
Access policies allow you to take control of the exact data you want to make available to your users in your organization.
Note: Users can only be assigned to one role at a time. Assigning a user to a new role will automatically replace their previously assigned role.
In this Section
Requirements to access and configure roles and permissions
Configuring roles and role permissions
Assigning roles to users
Access policies
Requirements for the roles and permissions
Access to the roles and permission setting is limited. Only users assigned with the “owner” role are allowed access to make changes to the roles and permissions settings.
Configuring roles and permissions
Roles:
A role represents a staff member’s job, and contains all the permissions that this user requires to do that job. For example, the preset “Owner” role grants the user unrestricted access to all domain data and is able to perform any action.
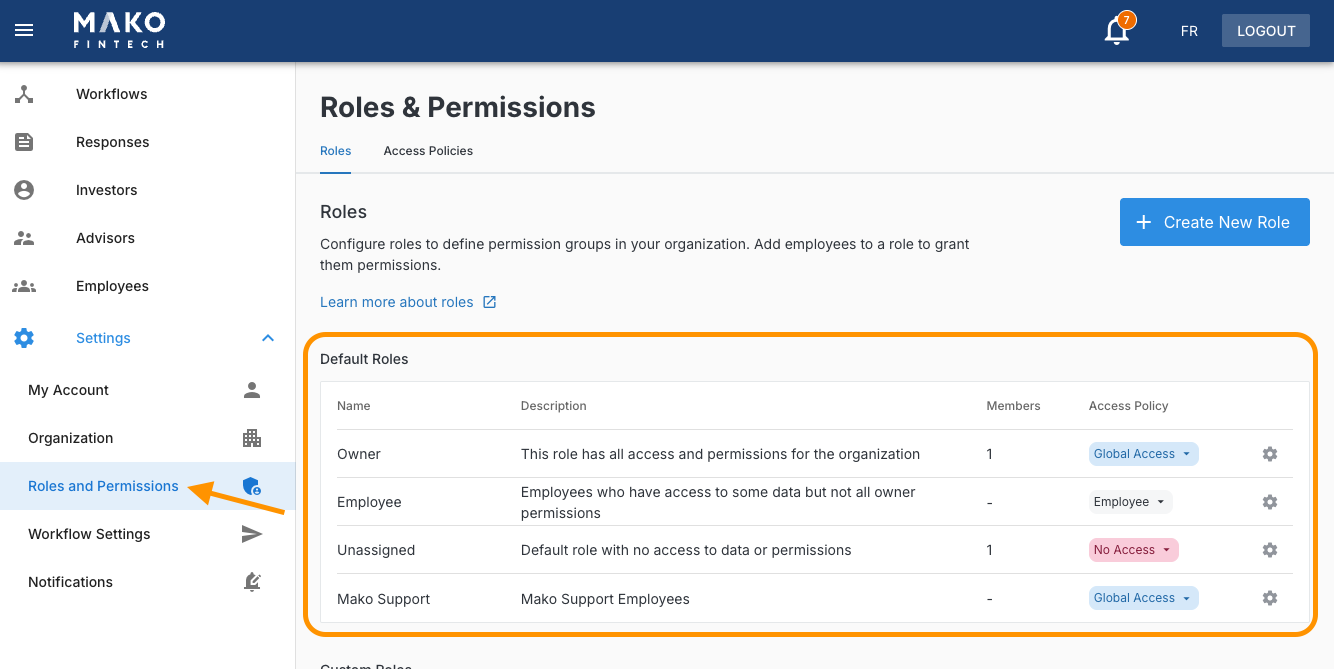
You can view, create and configure a role and its associated permission via the Settings > Roles and Permissions > Roles page of your admin.
Default Mako roles: Some roles are created by Mako and can’t be deleted. There are 3 types of roles created by Mako:
Owner: The owner role grants the user unrestricted access to all domain data and allows them to perform any action. This role has the highest level of permissions and cannot be customized.
Employee: Has all permissions except for maintaining roles & employees by default. You can customize the permissions for this role as needed
Unassigned: Has all permissions turned off and is not customizable.
Mako Support: Role dedicated assigned to Mako's support team.
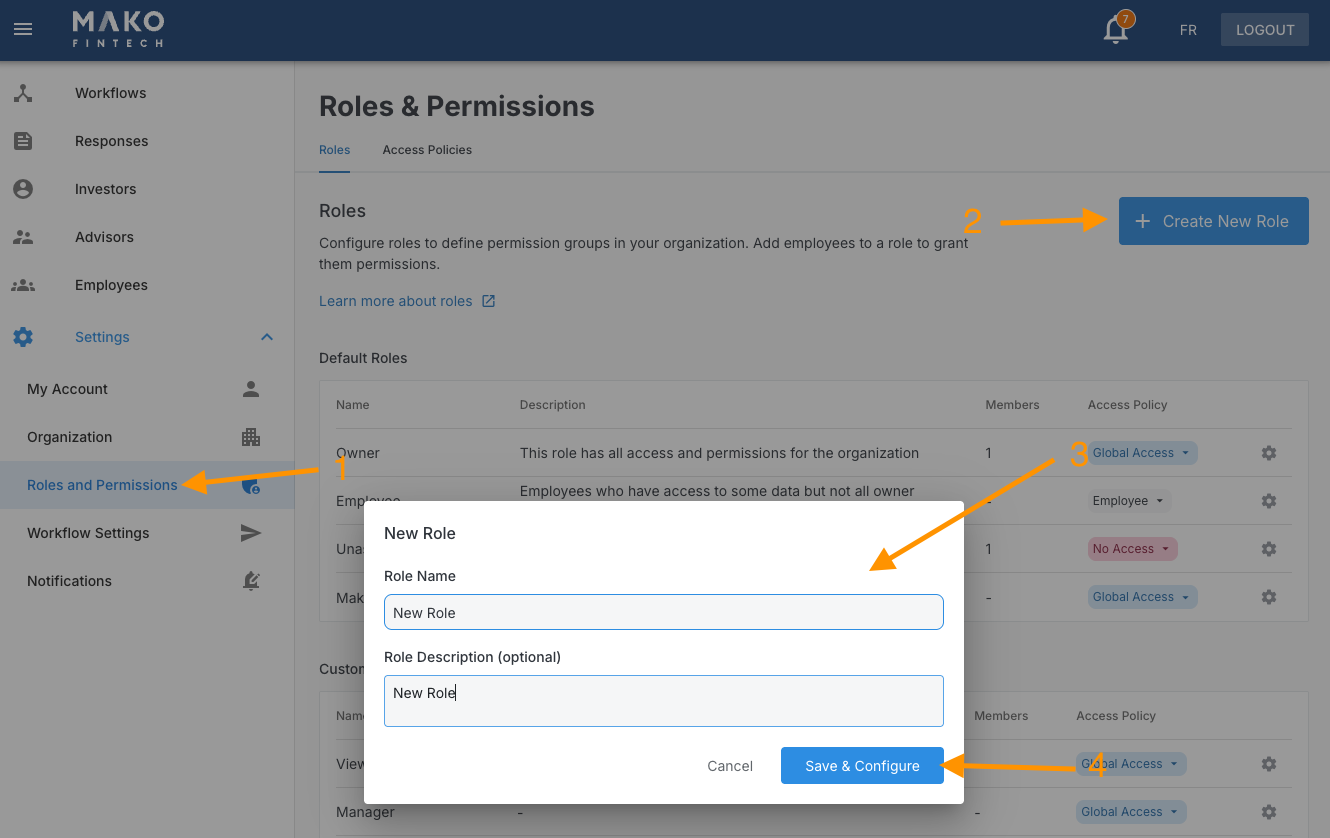
To create a new role, follow the steps below:
Navigate to the Roles and Permissions settings
Select the “Create New Role” button
Enter the role name and an optional description
Select Save and configure
The new role will now appear under the Custom Roles section
Note: Users can only be assigned to one role at a time. Assigning a user to a new role will automatically replace their previously assigned role.
Role Permissions
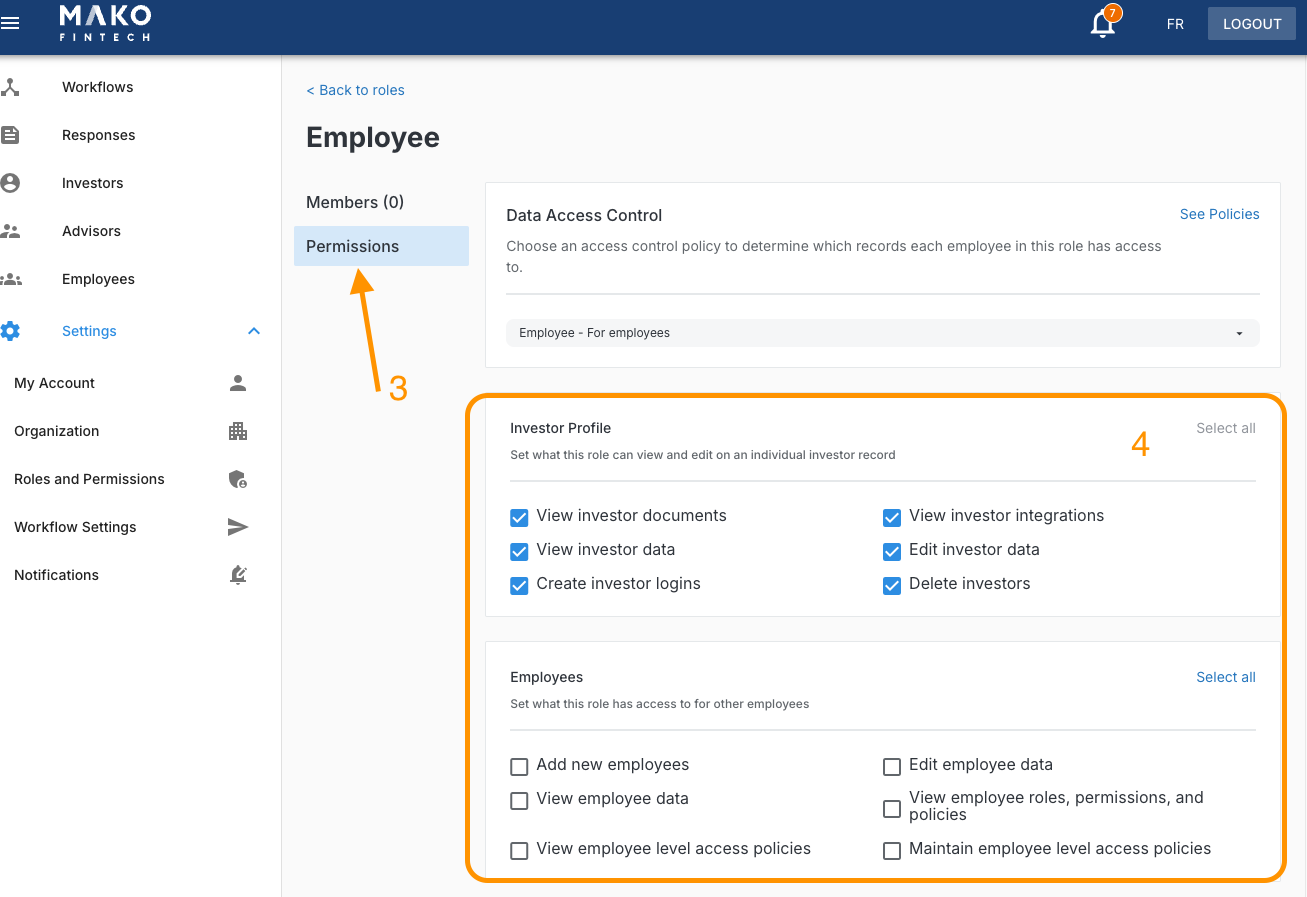
Permissions provide you the ability to grant or restrict access to specific settings and actions within a role. You can assign permissions to default or custom roles, or grant individual permissions directly to team members to provide precise levels of access based on their responsibilities.
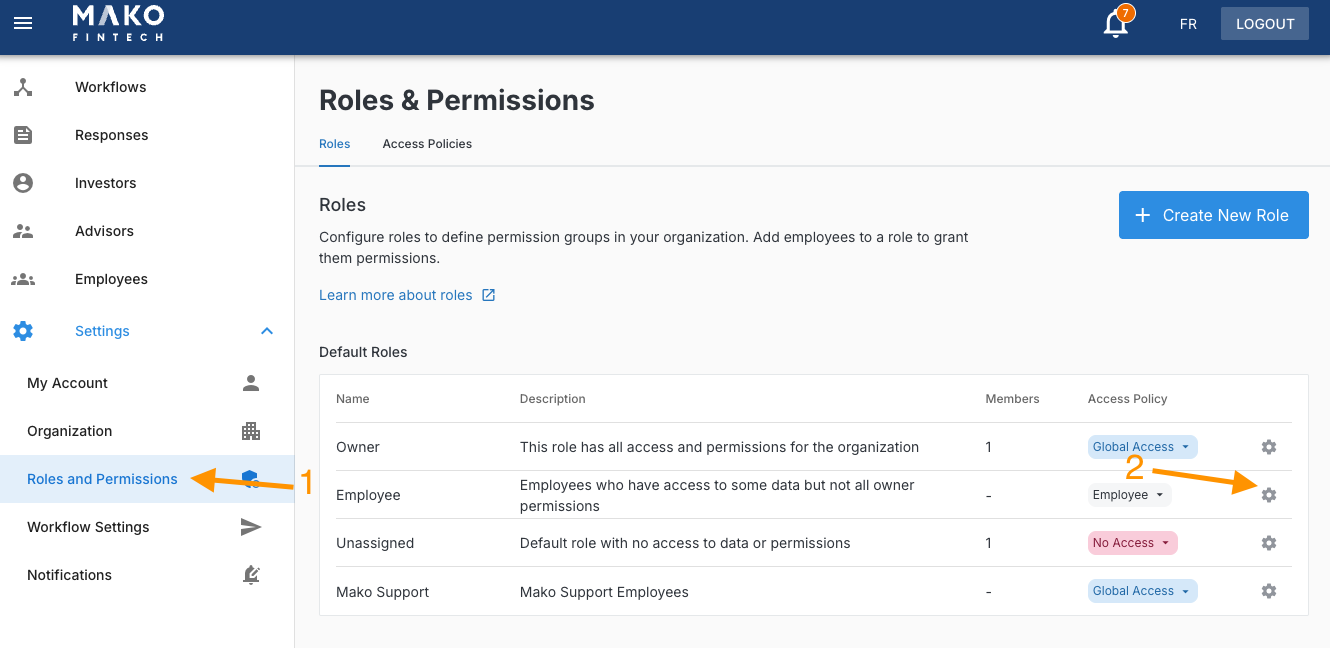
To edit a role's permissions:
Navigate to the Roles and Permissions settings
Select the “Gear” button of the role you'd like to edit
Edit Investor EIM Data: Modify investor data records directly via the investor’s profile.
Delete Investors: removing investor profiles.
Employee settings:
Create new Employees: Add new team member accounts.
Edit Employee Data: Modify employee record data.
Advisor settings:
Create new Advisors: Add new advisor accounts.
Edit Advisor Data: Modify advisor record data.
Settings permissions:
Maintain Integrations: Configure and manage third-party software connections.
Maintain Organization Settings: Modify high-level company and portal settings.
Maintain Email Settings: Configure system email templates and sending domains.
Assigning roles to users
To assign or update a user's role
Navigate to your portal’s Settings > Roles and Permissions.
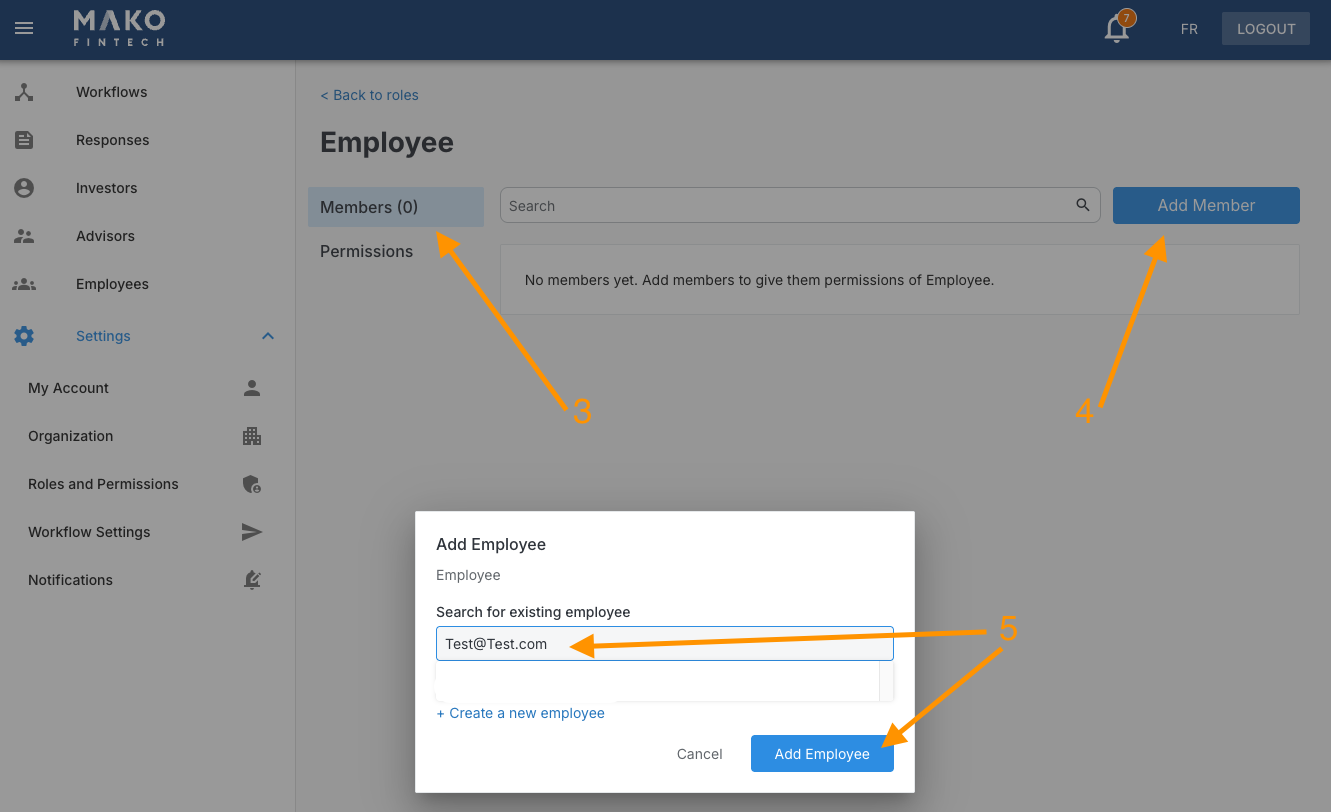
Under the “Roles” tab, select the gear icon of the role you’d like to assign the user to
Under the “Members”, select the add member button
Choose the user you’d like to update and select Add employee
Select “Save Changes”
Note: Selecting a new role automatically replaces the user's previously assigned role.
Access Policies
When determining what actions an employee or user can perform, the system checks both the permissions and the access policies configured for that role (Permissions + access policies). Access policies can be set on a granular level to permit the exact data (such as workflows, responses, investors) a user can see and access.
Access policies are configured based on your requirements by Mako's team during configuration. If you need assistance with this feature, please reach out to Mako Support.
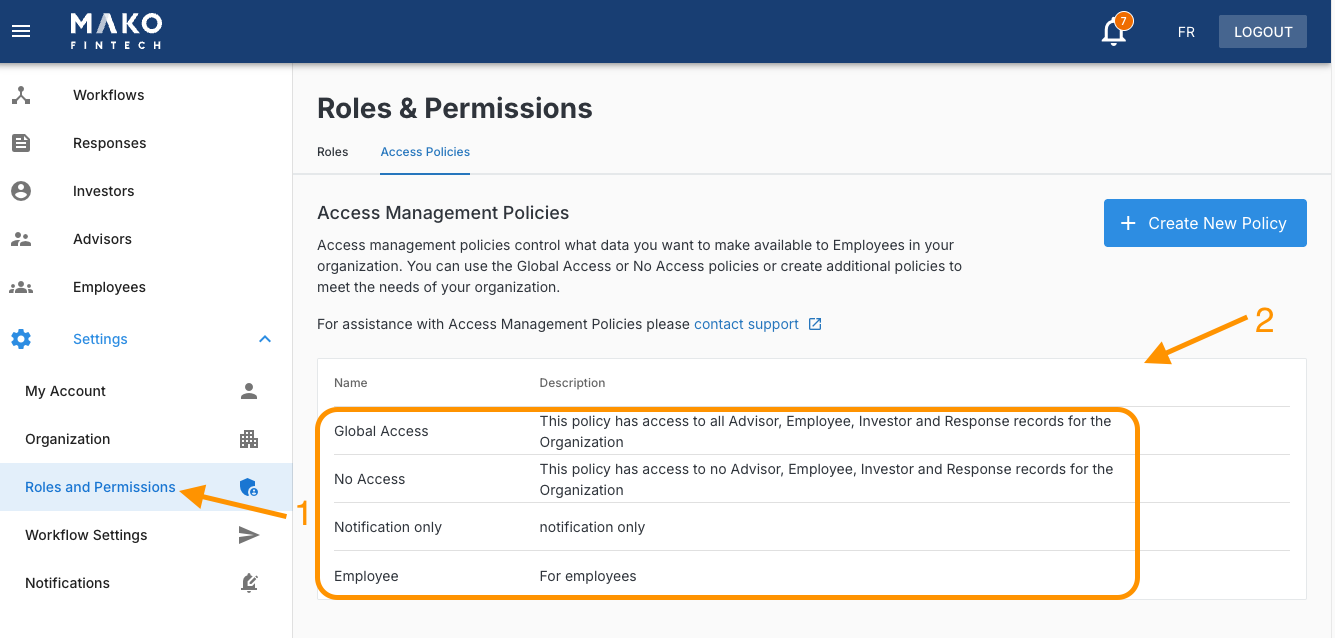
To view your access policy settings
Navigate to your portal’s Settings > Roles and Permissions.
Under the “Access Policies” tab, select the policy you’d like to review
Note: This is a highly sensitive feature which can affect your solution. We recommend that you exercise caution when actioning this feature and reach out to our support team for assistance.